so i wrote this little tutorial, a very easy one on how to get started :)
I'm using Photoshop CS3 (which has incorporated some functions of ImageReady);
make sure you have Quicktime installed or it won't work!
First of all, search/download the video you want to use (as a tip,
try searching for a shorter video that includes the scene you want to turn into a gif,
like youtube and such, instead of opening the whole movie/episode/whatever).
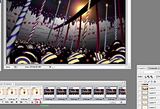
Now open Ps and go to File> Import video frames to layers; type ' *.* ' to see all the file formats.

Now hold down shift key as written to select only the part of video you want to use.
Click ok. Make sure you have the animation window open! (if not, got to Window>animation).
Let's start with selecting and deleting unwanted frames that happened to be included.

Next we're going to delete some of the many frames that compose your gif;
keep only two frames or even just one for every little "scene",
otherwise your animation is gonna be too heavy!!
When you're done, select all frames..

and using the Crop tool or the rectangular selection,
crop the image to show better the subject and to remove
unnecessary portions of the background.
We're also going to resize it, because we don't want an enormous gif xD
From Image>image size, change your settings.
Now it's time to edit the time frame!
By now you should have already noticed the little play/stop button
on the animation window, you can use them to see the animation
going and to check whether the "speed" is just how you want it or not.
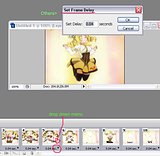
Select ALL the frames and click on the tiny arrow.
You can choose either the fixed duration on the drop down menu or click on
Other and set your own duration time.
By doing this you're setting the frame delay, basically you're deciding if
you want your animation going faster or slower. You can also assign different
values to each frame by selecting them one by one. :)

Once you're done with the timing the gif is practically finished
but, if you want to add something, now's the chance :D
Whether it's a text layer, an adjustment layer, some brushes, a texture,
just make sure you have all the frames selected! Then it won't matter which frame
you're actually working on, the additional layer(s) will be on all the animation.
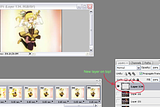
Go to the top in your Layers' box and add the new layer!

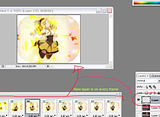
As an example, i'm going to add a little frame, just because:

(you can see my new layer has been applied on every frame)
Oh and remember you can check your gif anytime by using the play/stop button! ;)
Go to File> Save for web and devices. Save and we're done!

So this is basically how i made gifs like these:


..and how one makes those funny gifs we always see on tumblr xD
Anyway, i'm pretty sure there are tons of tutorials out there and other ways
to make animated gifs, but i thought of writing this anyway^^ Hope it was helpful!
If you have any questions or suggestions, feel free to add a comment!
Sorry for my english!
m(_ _)m

3 commenti:
cavolo, ci proverò, quando le facevo io usavo un programma scadentissimo e mi venivano delle mezze schifezze ^^'
(Dirge of cerbeurs = love)
che programma usavi, per curiosità?^^
mi ricordo che taaaanto tempo fa avevo jasc animation shop xD
(concordo!)
oddio, non mi ricordo neanche il nome... meglio così forse, era veramente uno strazio! XD
Posta un commento